Don’t curse your sale horse with the equine equivalent of a bad yearbook photo — show him off by learning how to photograph him to his best advantage!
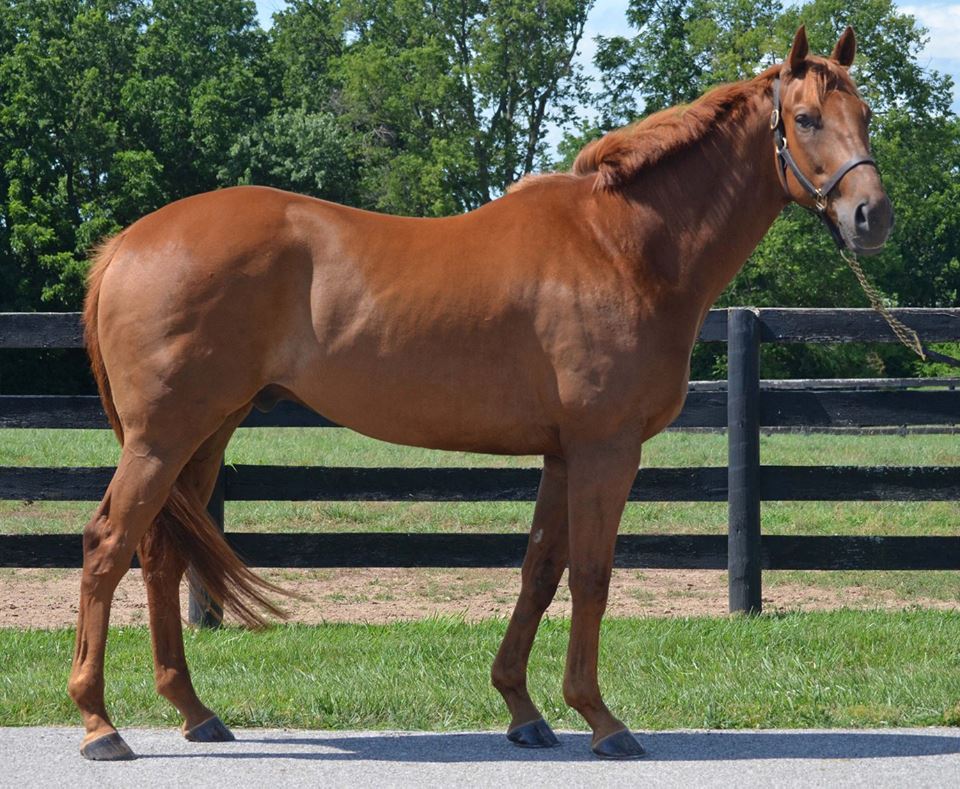
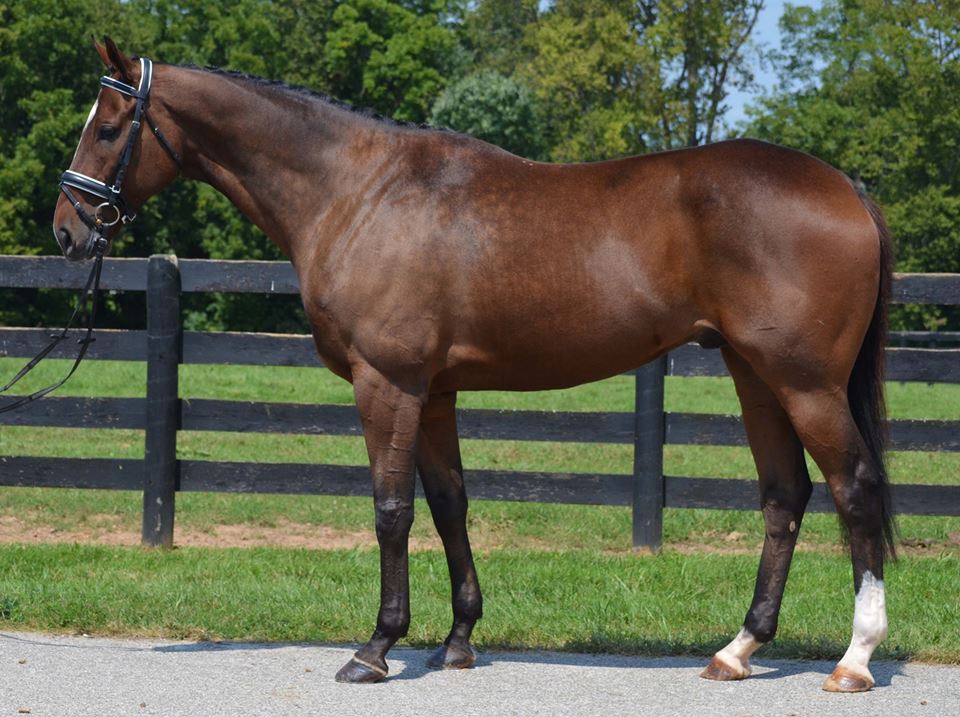
The horse is standing on a level surface where it’s easy to see his hooves, set off nicely with a pretty background, and despite shadows, legs are clearly visible. Courtesy of Secretariat Center, secretariatcenter.org.
A really good conformation photo serves two purposes. First and most importantly, it shows the horse in a manner that allows potential buyers to easily evaluate his build and suitability for various disciplines. An educated eye can predict pretty accurately from a conformation photo how a horse will move or jump.
Secondly, it’s an attention-grabber. In a sea of horse-for-sale listings, a good conformation photo stops your eye from skimming down the page and says LOOK AT ME.
Naturally, a lot of this has to do with the horse, how he’s built, and whether or not he has that “wow” factor. But a good conformation photo can show any horse off to his best advantage.
If you can spring for a professional equine photographer, go for it! You’ll likely be thrilled with the results. But you can also get great DIY photos, once you learn the do’s and don’ts. (Hint: a picture of your horse standing loose in his paddock does not count as a conformation photo!)
Equipment
Everyone has a camera in their pocket these days, but you’ll likely be much happier with the results if you use a “real” camera (i.e. not your phone) for these photos. The perfect photo is a fleeting moment in time when your horse’s ears are pricked, and a cell phone camera isn’t going to be fast enough to catch that moment without a LOT of near-misses. Invest in a decent digital camera with a telephoto lens, borrow one from a friend, or befriend a photographer and ply them with the alcoholic beverages or baked goods of their choice.
If possible, it’s best to use a longer telephoto lens (200 to 300 mm). You’ll want to back as far away from your horse as you can, and then zoom in with the lens so that the horse mostly fills the frame. This will create what’s known as a shallow depth of field — the subject (your horse) is the focal point of the photo and the foreground and background are not in as sharp focus.
In addition to a good camera, you’re also going to need some extra hands to help you pull this off. Ideally, you should have four people — one to take the photos, one to hold the horse, one to help position the horse, and one to get his ears pricked for the photo. In a pinch, you can get by with fewer people if they’re willing to multitask, but things will go faster with more help… and remember your horse is going to have a finite amount of patience for this project!
Develop a plan
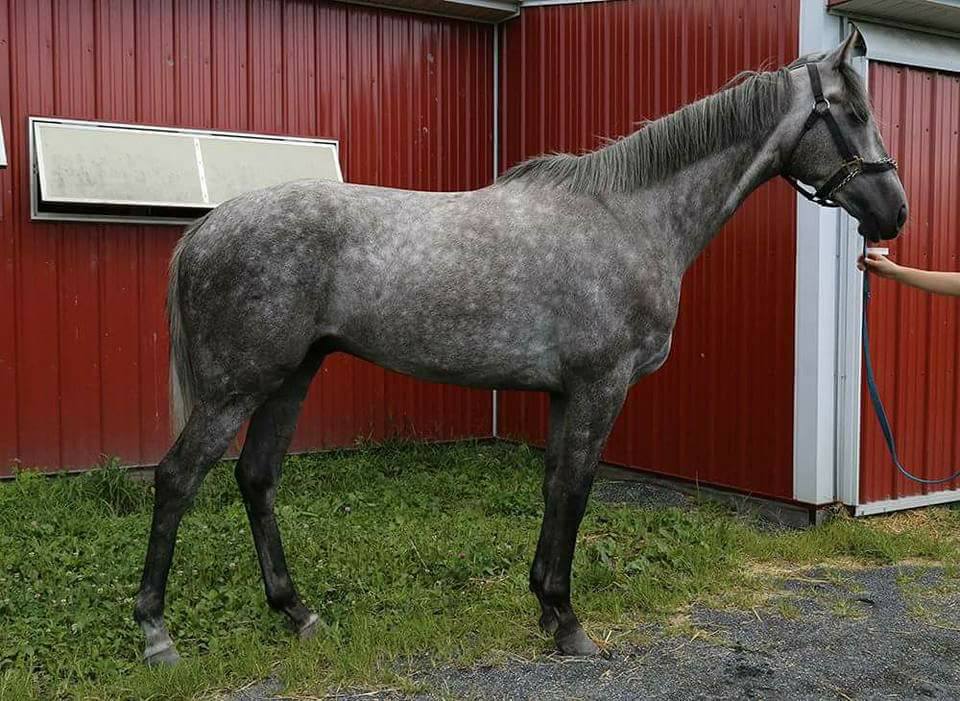
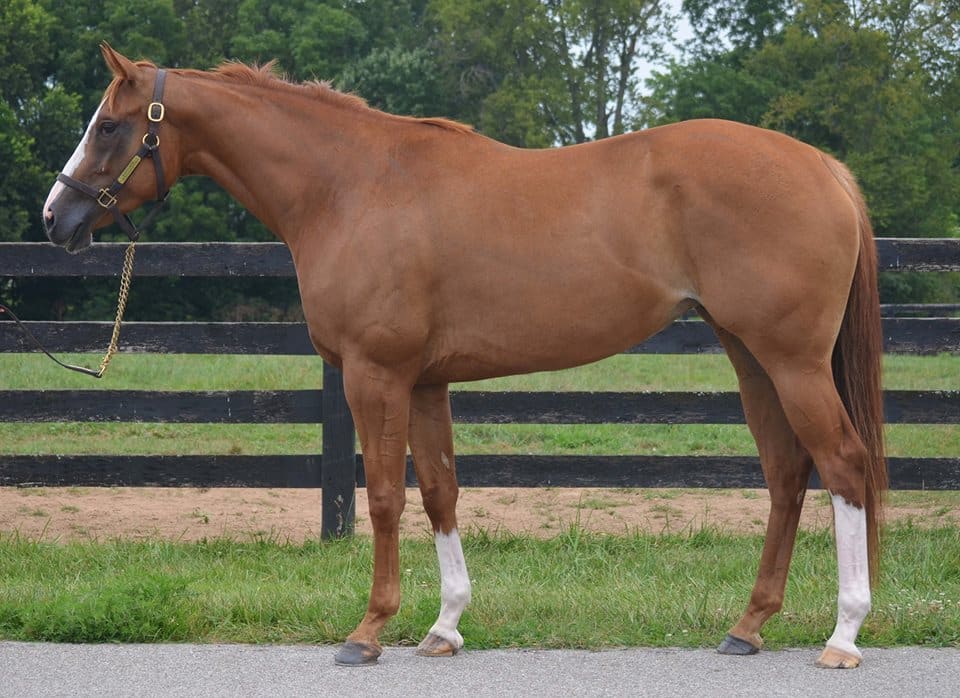
Not as picturesque a background, but it’s free of distractions and easy to see all parts of the horse. Courtesy of Benchmark Sport Horses, benchmarksporthorses.com.
This isn’t necessarily going to be a quick process, so don’t try to cram it in when you’ll be rushed — patience is your friend. Take into account what will be going on around you, too. Your glamor shoot isn’t going to go well if all the other horses in the barn are getting fed at the same time, or if there’s an insanely loud tractor dragging the ring and creating giant dust clouds. Plan your shoot around your horse’s routine so you’re taking photos at a time when he’s rested and relaxed, and give yourself plenty of time. Your horse will likely look perkier if you’re shooting before he’s been ridden, rather than after. If he’s turned out all night, you’ll probably want to shoot in the evening, rather than in the morning when all he really wants is to lie down and take a nap.
Very bright sunlight is not your friend when taking conformation photos because it will create harsh shadows, so try to schedule your photo session in the morning or late afternoon. A little cloud cover can also help soften the light a bit, but it should be bright enough that you can still see your shadow. The very best light is usually two or three hours before sunset. Stand with the sun behind you, illuminating the side of your horse. (Make sure you’re far enough away from the horse that your own shadow isn’t in the shot.)
Remember that these are horses, and things won’t always go according to plan. If it’s not happening, call it a day and try again another time.
Location, location, location
Yes, of course, the horse itself is the focal point of your photograph, but if you’re not careful about where you take the picture, the background may steal the show. No one will notice your gorgeous horse if there’s a pair of dogs humping in the background or a telephone pole sprouting out of your horse’s head.
A picturesque background is lovely, but if you’re not fortunate enough to live on an equestrian estate nestled among rolling green hills, just keep it simple — an uncluttered backdrop without a lot of distractions. The side of a barn works fine, or a grassy hill or a stand of trees. (Here’s where the telephoto lens helps you, because the shorter depth of field means the background is not in as sharp a focus and any “imperfections” will be less noticeable.)
You want a background that contrasts with your horse — don’t shoot a dark bay up against a black barn, or a horse with high socks in a bright sand ring, because it will be much more difficult to see where the horse’s body ends and the background begins. Pay special attention to what’s in the background behind your horse’s legs. You don’t want a potential buyer thinking: “Does that horse have a big knee, or is that just part of the bush he’s standing in front of?”
Once you pick your backdrop, you’ll want to stand the horse up about 30 feet away from it, rather than right up against the side of the barn, fence, etc. This helps the background stay in the background!
Most important of all, be sure the spot where you’re standing up your horse is level. Grab a long 2×4 and lay it on the ground, back up, and eyeball it — is the board level? A slight up- or downgrade makes your horse look uneven. (And don’t try to cheat and make your horse look more uphill by standing him on a slight hill… buyers will notice and wonder what else you’re trying to fudge!) A barn driveway or other stone or paved pathway is ideal, but a riding arena or level grassy area can work fine too. If standing the horse up in the grass, make sure the grass is cut very short so his hooves are still mostly visible.
Once you’ve picked your horse’s location, you need to select your own. Imagine a bull’s eye or gun sight over your horse, centered right in the middle of his barrel at his girth area. Your camera should be in exactly that spot, shooting perpendicular to the horse. If you’re a little too far toward the horse’s head or tail, you’ll distort his body proportions, and the same if you’re shooting on a slight downward or upward angle. You want to stand at the horse’s girth area — between his shoulder and the middle of his barrel — and you’ll probably need to crouch down a bit to be at the right height.
Details matter
A more formal shot, with the horse bridled and braided. Courtesy of Secretariat Center, secretariatcenter.org.
If you really want to go hog-wild and give your horse a bath, polish his hooves, and braid him, go for it! But you don’t have to go quite that far. Just make sure the horse is totally clean and well-groomed. The mane should be pulled, if traditional for your sport — if not, shoot the horse with the mane combed over to the opposite side so his neck is clearly visible. Trim the hair on his fetlocks and ears. Make sure he has a neat bridle path, and brush out his tail. Knock the dirt off his hooves with a stiff brush, and wipe the boogers out of his eyes and nose.
Don’t spend all that time making your horse look beautiful and then take his pictures in his ratty old turnout halter — use a nice quality, clean leather halter, or a clean, plain bridle with a simple bit. Also, make sure it’s fitted correctly! A too-low bridle noseband or a too-big halter will make your horse’s head look out of proportion.
Your horse’s handler should be dressed neatly, in a workmanlike manner. Most likely you’ll be able to crop the handler out of the photo (he or she should be standing a few steps away from the horse), but if the shot where your horse looks best has the handler in an un-crop-able spot, you’re really going to be sad if that person is wearing flip flops and a Guns N’ Roses t-shirt.
Strike a pose
Your horse is clean, he’s standing in a nice spot, the light is perfect… now just get the horse to stand still and prick his ears, right?
WRONG! Here’s where it gets even more complicated.
Different sports have slightly different traditions for how horses are “stood up” for a conformation photo, so this may vary slightly depending on the audience to whom you’re marketing your horse. But the main thing is that the horse should be standing square — the front and rear cannon bones closest to the photographer should be perfectly perpendicular to the ground. A horse that’s not standing square will look camped-out, and it will be too difficult to accurately judge the angles of his shoulder and hind leg.
It takes some work to get the horse standing like this — a horse naturally standing around isn’t likely to be standing square. You want to walk the horse forward onto his “mark” (the ideal shooting location), rather than backing him into it, and you’ll likely have to pick up and place his hooves where you want them. (Over and over and over again.)
While you want the front and back leg closest to you to be square, you’ll want to place the other front leg slightly back, and the other hind leg slightly forward. This way all four legs are visible. If you can’t quite get your wiggly young Thoroughbred to put his legs in exactly the right spots, just try to get him standing mostly square with his legs slightly offset so they’re all visible.
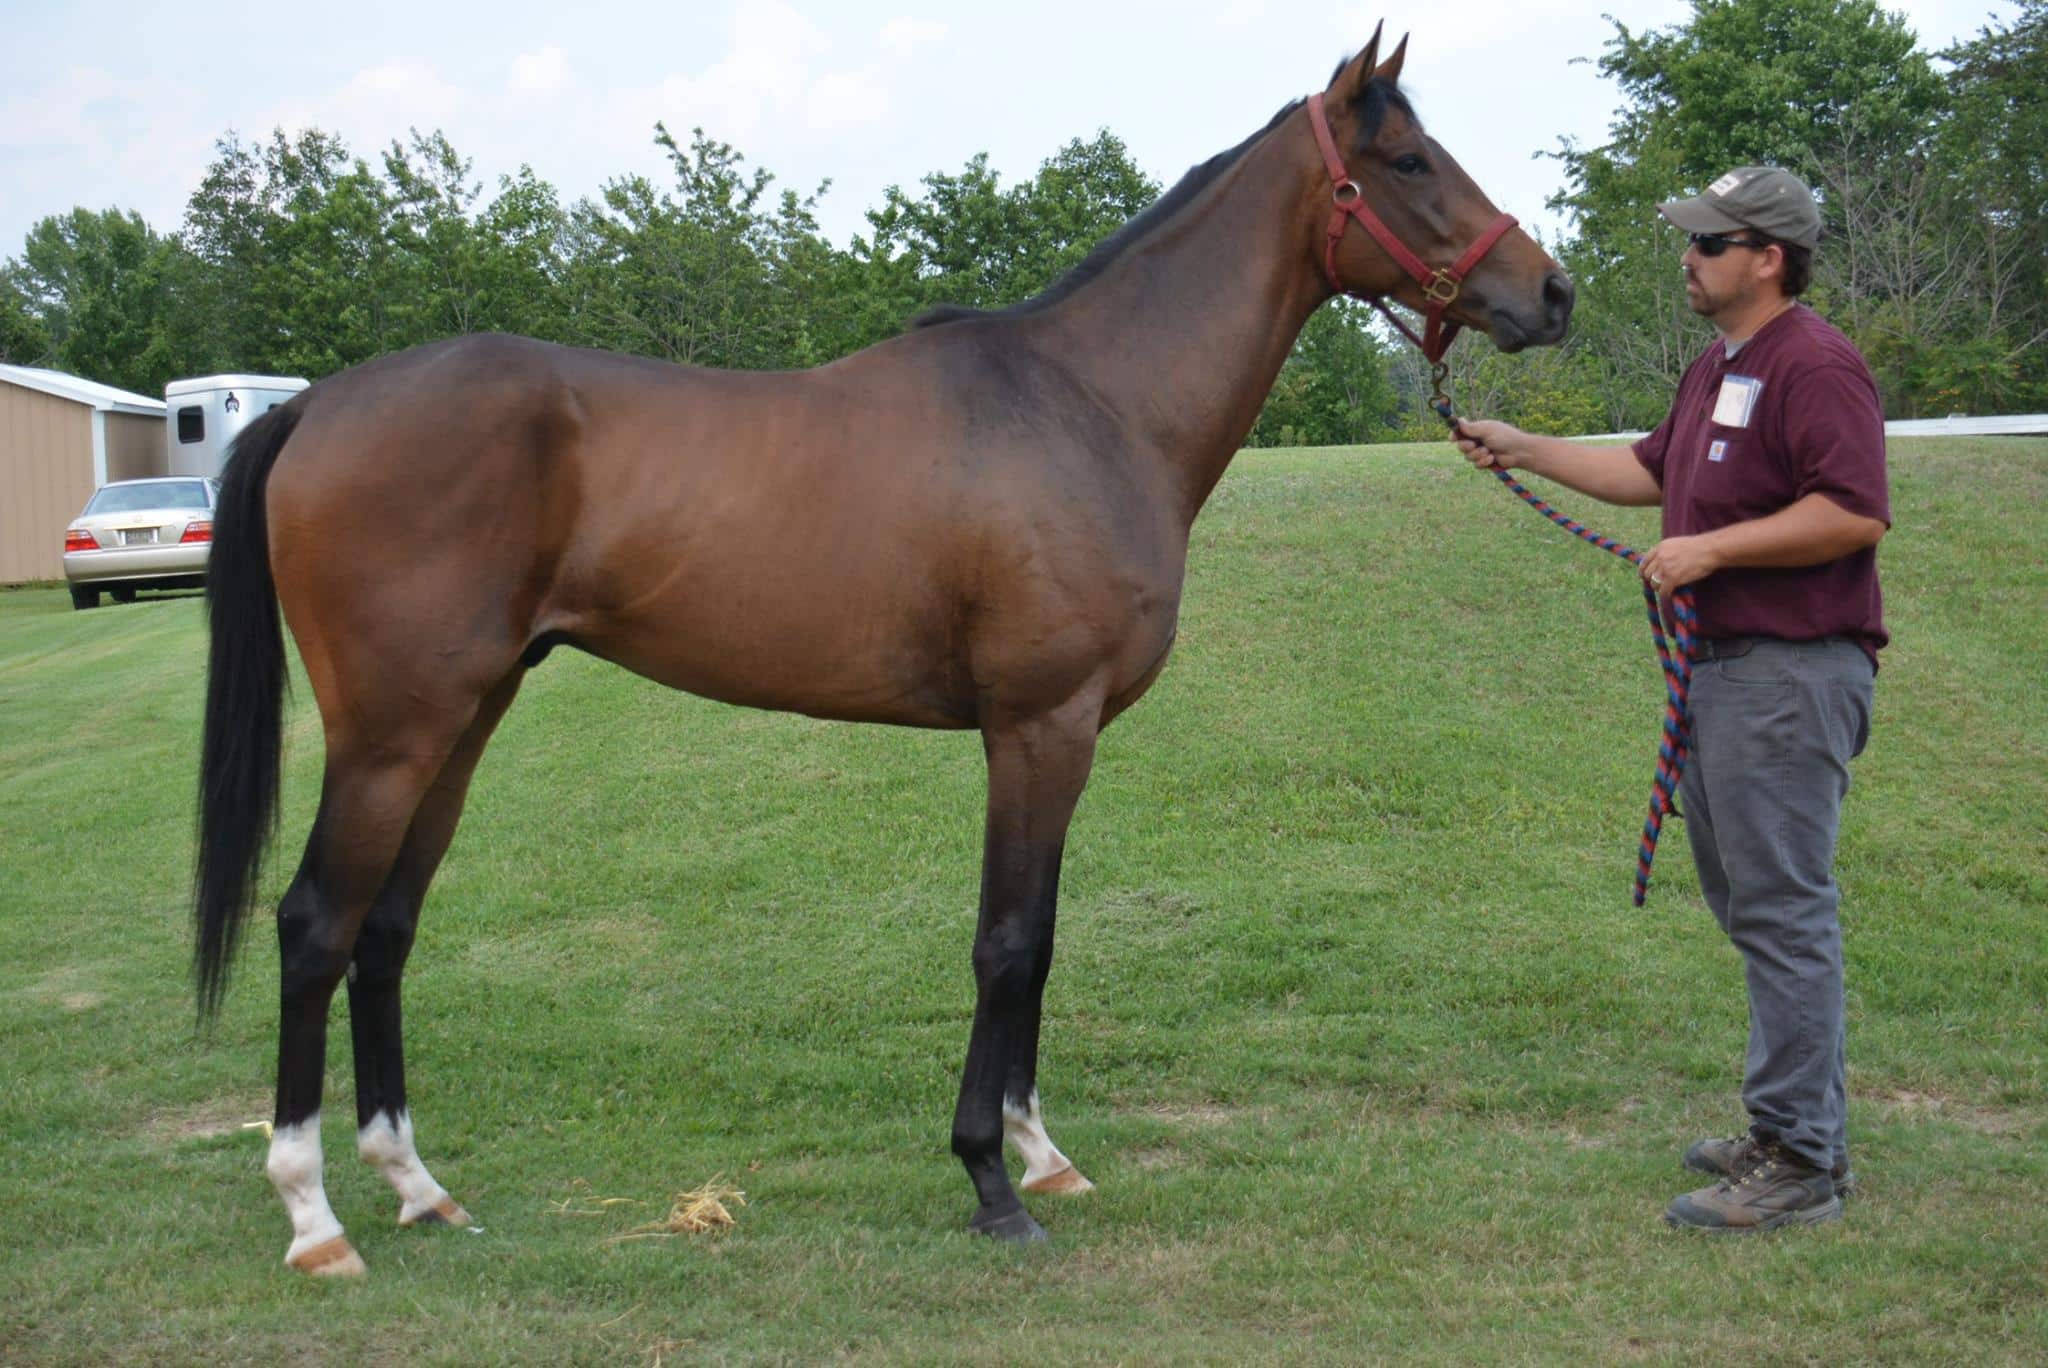
This just-off-the-track Thoroughbred’s conformation is easy to see in front of the sky and grass in the background, and although he’s not “stood up” in the classic sense, he’s standing square and you can see most of all four legs. Courtesy of Benchmark Sport Horses, benchmarksporthorses.com.
The horse should be looking slightly, but not directly, toward the camera, so his head will be turned just a bit toward you. (But looking straight ahead is OK too.) Ideally you want his head carriage to be somewhat relaxed, rather than on “high alert” with his head held straight up. Some disciplines like to photograph a horse with his neck stretched slightly out and down, while others use a more natural head carriage. Check out how professionals in your discipline photograph their horses for sale, and model your shoot after those.
If you have an extra person (besides the handler) to try to get the horse’s attention, you want them to stand a few paces behind the handler, and a few steps closer to you, so the horse will be looking just a little bit toward the photographer. Have an array of props on hand to get the horse’s attention and his ears pricked — a bucket of feed, a plastic bag, some crinkly peppermint wrappers, a soda can with a few pebbles in it. The handler can grab a handful of dirt or grass and toss it up in the air, or can otherwise jump around and make goofy noises to try to get the horse’s attention. (You may want to gift the person charged with getting your horse’s ears pricked with booze before the shoot rather than after.) You’ll have to play around to find the sweet spot of having the horse interested but still, rather than walking toward you for that yummy peppermint, and attentive but not spooked by that noisy plastic bag.
A classic conformation shot will be required to put your horse in the Makeover sale listings, but while he’s all gussied up, take a few additional shots that you can provide to potential buyers. Take some nice head shots to show off your horse’s sweet nature and soft eye, or their fancy markings. Take some candids of him nuzzling your pockets for treats or snuggling with his handler. Get a few closer-up shots of legs and hooves, photographing the fronts and hinds separately — shoot both from the side, and then take a shot of the front legs from directly in front of the horse, and one of the entire rear of the horse, standing directly behind him.
Finally, don’t be afraid to take breaks and walk the horse around or give him some good scritches. Most of our Makeover horses are young and green, and standing JUST SO for extended periods of time is hard. Sometimes standing almost-square will have to be good enough! Bring your patience, and make sure your camera battery is fully charged because you’ll want to take a lot of photos. Most of them will be unusable, but with luck and practice, you’ll get the winning shot!
As close to perfect as a conformation photo can get! Ears pricked, the cannon bones of the legs closest to the photographer are perpendicular to the ground, and all parts of the horse’s body are clear and easy to see. Courtesy of Secretariat Center, secretariatcenter.org.